The following steps will assist you in setting your e-mail account up in Outlook 2013:
1. Open Outlook 2013. If have just installed Outlook, then the Welcome to Microsoft Outlook 2013 wizard will appear.
Click on Next.
Note: If the wizard does not appear, proceed to Step 3.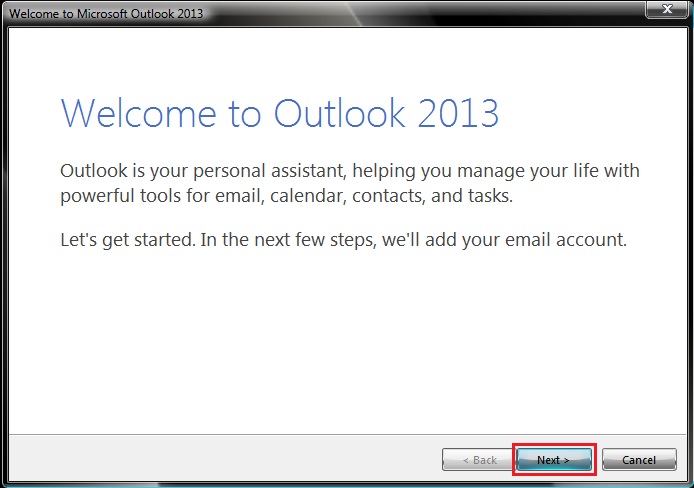
2. On the Add an Email Account page, select Yes and click on Next and proceed to Step 5.
3. If the setup wizard is not launched when you open Outlook or you have already configured at least one e-mail address, click on the FILE tab.

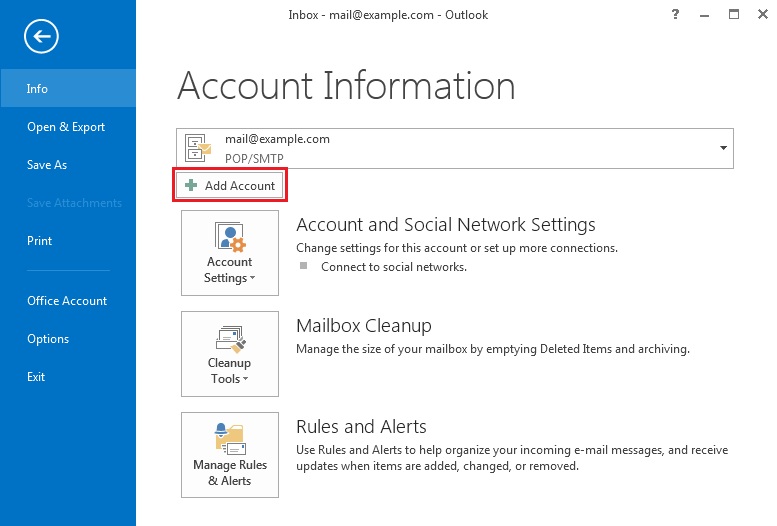
4. On the Account Information page, click on the Add Account button.
5. On the Auto Account Setup page, select Manual setup or additional server types and click on Next.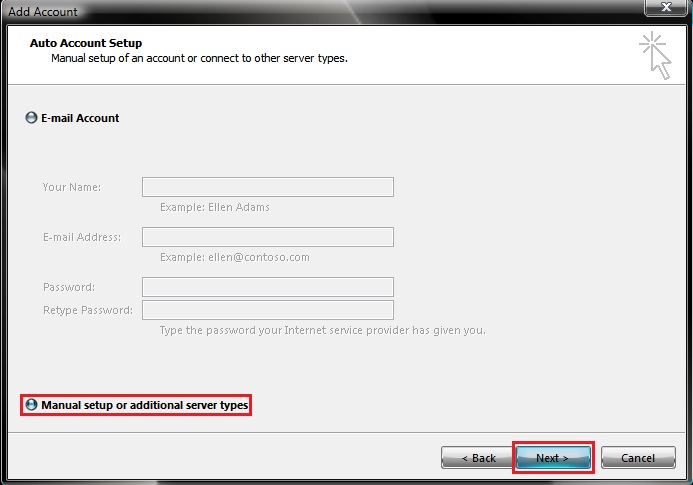
6. On the Choose Server page, select POP or IMAP and click on Next.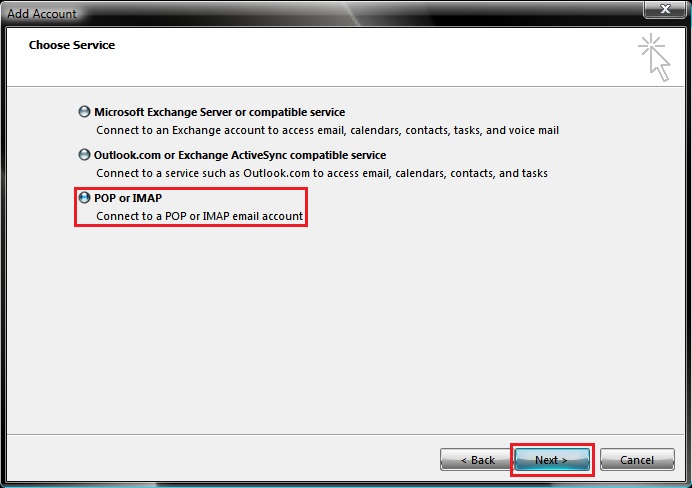
7. Provide the following information on the Internet E-mail Settings page:
Under User Information:
- Your Name: Enter the name you want recipients to see when you send e-mail from this account.
- Email Address: Enter your email address (e.g.: mail@example.com).
Under Server Information:
- Account Type: Select POP3.
- Incoming mail server: mail.yourdomain (e.g.: mail.example.com)
- Outgoing mail server (SMTP): mail.yourdomain (e.g.: mail.example.com)
Under Logon Information:
- User Name: Enter your entire email address using lowercase characters (e.g.: mail@example.com).
- Password: Enter your password.
- Remember password: Ensure that this box is ticked.
Once you have enter the information above, click on More Settings.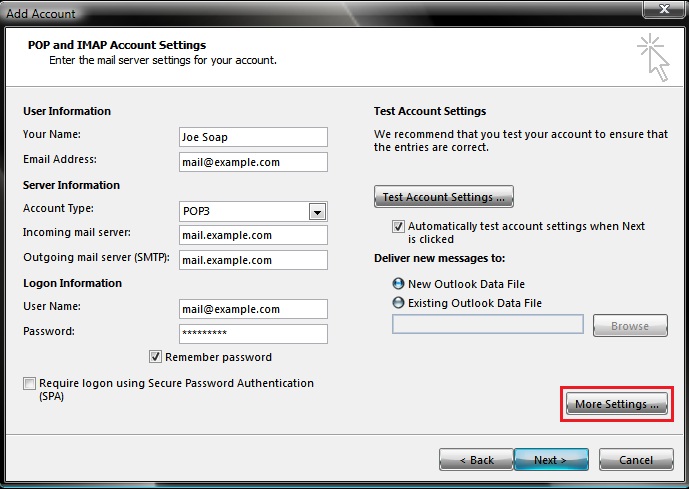
8. In the Internet E-mail Settings window, enter a description for the account in the Mail Account field.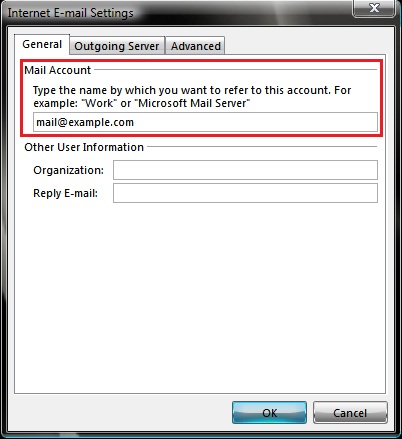
9. Click on the Outgoing Server tab.
Place a tick in the box labelled My outgoing server (SMTP) requires authentication.
Ensure that the option labelled Use same settings as my incoming mail server is selected.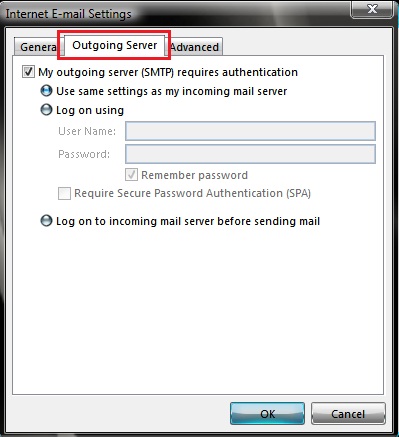
10. Select the Advanced tab.
Server Port Numbers:
- Incoming server (POP3): Set this to 110.
- This server requires an encrypted connection (SSL): Ensure that this box is unticked.
- Outgoing server (SMTP): Set this to 587.
- User the following type of encrypted connection: Set this to None.
Delivery:
- Leave a copy of messages on the server: Tick this box if your e-mail account must also be accessed from another computer or mobile device.
- Remove from server after x days: If you leave mail on the server, set this option to 3 days.
- Remove from server when deleted from 'Deleted Items': Enable this if you would like messages which you delete to be removed from the server immediately.
Click OK.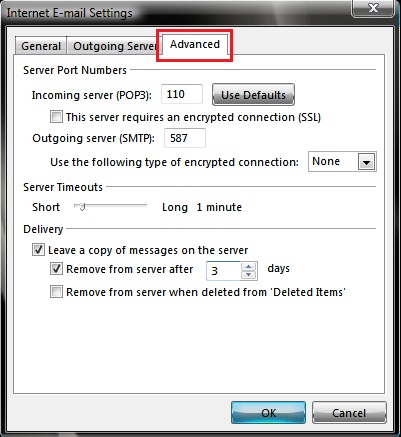
11. You will be returned to the Add Account page. Click on Next.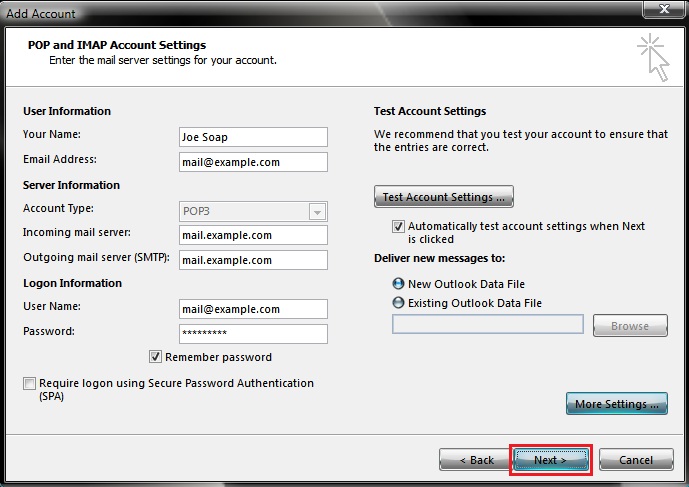
12. Outlook will open the Test Account Settings window andtest your account settings. Once this has been completed, click on Close.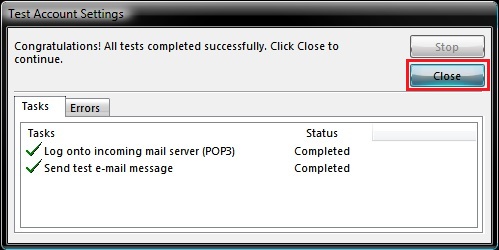
13. Outlook will confirm that your e-mail account has been set up. Click on Finish.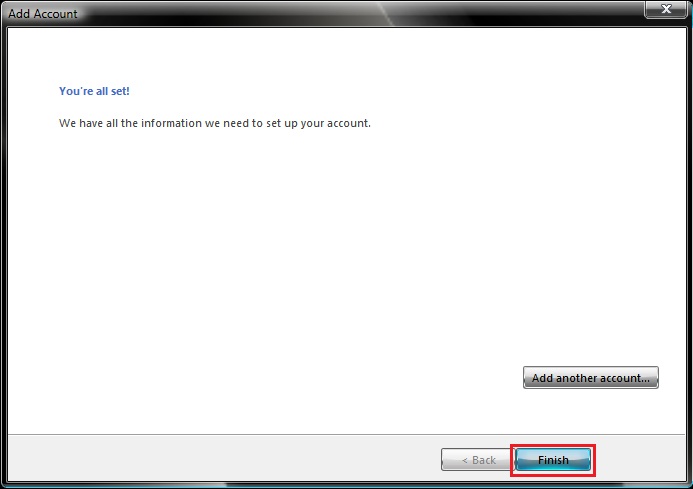
Note: If this is the first e-mail address which you have set up after recently installing Outlook, then you will be prompted to confirm whether Outlook should be configured as your default e-mail program.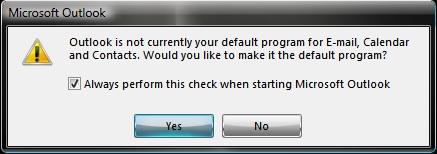
Untick the box labelled Always perform this check when starting Microsoft Outlook.
Click on Yes if you want Outlook to be your default e-mail program.
Click on No if you have configured another e-mail program as the default program.
A video tutorial can be viewed below.


